BecomeSingers is reader-supported. When you buy through links on our site, we may earn an affiliate commission. Learn More
Using FL Studio to record vocals for the first time can be intimidating. Thankfully, it is one of the easiest DAWs (Digital Audio Workstations) for beginners. In this article, I’ll walk you through how to record vocals in FL Studio.
As a recording engineer with over ten years of producing music experience, I’ve tested FL Studio and understand how complicated it all looks for a beginner.
Along the way, you’ll learn more about some mechanics DAWs use, making it easier to experiment with other software with more features once you better understand how vocal recordings work. Let’s dive in.
Table of Contents
Is FL Studio Good for Voice Recording?
Yes, FL Studio works well when recording voices. Many professional recordings have been made with FL Studio, and you can use this DAW, or other ones, to enhance vocal recordings later.
The hidden truth is that any recording software is good at recording voices. When it comes to the quality of the recording, it’s all about the gear, computer hardware, and techniques you use.
However, recording vocals are only a small part of the music production process. You’ll notice that after a vocal recording session, you’ll need to polish the track by editing it, adding effects, and various other processes. This is when the DAW you choose affects the outcome of your work since every software’s functions and quality differ.
In FL Studio’s case, recording vocals aren’t as straightforward when compared to other vocal recording software, and there are several ways to achieve it. I’ll tell you the easiest methods to do it so that you can choose your favorite later.
How do I Record My Vocals in FL Studio?

In this article, I’ll assume you already have a microphone and audio interface. Even though you could record with your built-in microphone on your laptop or use the onboard sound card, we don’t recommend it. The recording quality can suffer compared to dedicated audio hardware, and you’ll probably have latency issues. We’ll discuss this in detail later on.
Method 1: Arming a channel for recording
Before recording anything, you’ll need to set up things. Think of it this way: Unlike a video game, FL Studio doesn’t know what audio device you want to use or how to configure them. You have to tell the software about those things via configuration.
- Ready your gear.
Get your microphone and audio interface ready, even if it’s your onboard sound card. If you’re using studio monitors and they’re in the same room, turn them off and use headphones so you won’t get feedback.
- Configure the ASIO driver.
Next, If you bought a dedicated audio interface, it comes with an ASIO driver. This piece of software is an intermediate between the DAW and your hardware, and it’s necessary for recording with low latency. So, the first step is to configure it.
On the top menu, go to OPTIONS, then Audio Settings. A new window will pop up, where you must go to the Audio tab. You’ll see a Device item first, where you select the ASIO driver. You need to look for something that resembles the name of your audio interface.
- Recommended: Use ASIO4All if you don’t have ASIO drivers.
If you don’t have dedicated hardware, you can use the included ASIO drivers or install the ASIO4All drivers, which, in my opinion, are a better choice. These allow you to record with low latency without special hardware. After installing them, the option ASIO4ALL v2 will show up. Select it.
- Lower the buffer size.
You can change some settings here if you’re a more intermediate user. I recommend you reduce the Buffer size only if you’re experiencing a lot of latency (sound comes with a noticeable delay).
- Increase the buffer size if issues arise.
Be mindful that reducing the latency doesn’t come for free. It adds more stress to the CPU, and your audio interface also has minimal inherent latency. If you set it too low, performance might be sluggish, and you may hear only garbled sounds. If that’s the case, you need to increase the latency.
- Select your microphone input.
Now that you have everything set up, it’s time to record! There are a few more steps before pressing the record button, however. The first step is to select the input where your microphone is.
Pressing F9 will take you to the mixer window. You’ll see the mixer with things like Insert 1, 2, etc. These are what more closely resemble channels from any traditional DAW. Choose one, then click on the arrow pointing to a box at the top. It’ll open a drop-down menu where you need to choose the input where the microphone is connected.
- Arm for recording.
Next, you need to check whether the “arm for recording” button is clicked on the mixer. This is the red circle that shows as white when it’s off. If it’s white on your selected channel, click it to turn it on.
- Press the recording button.
Now, you can simply press the red button at the top. When you finish, press the spacebar to stop. Later, you can assign that recording to a slot in the mixer and add effects, like reverb or equalizers.
Method 2: Edison

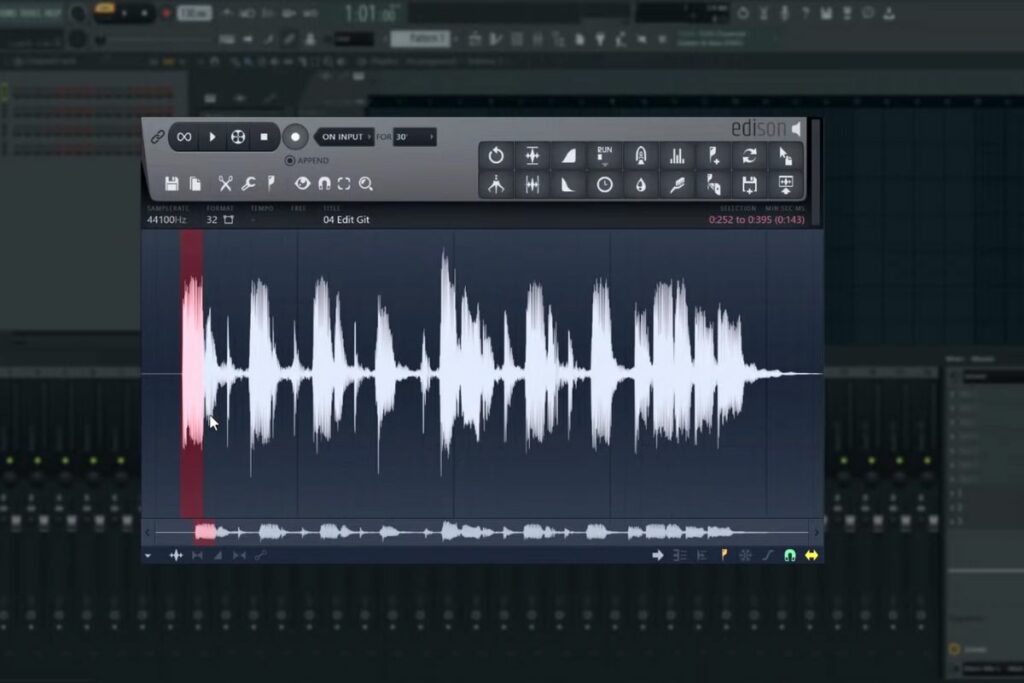
If you don’t like the workflow in FL Studio, you can opt for a more traditional alternative: the included Edison audio editor/recorder.
- Add Edison to your channel.
You must add Edison to your channel (or, as FL Studio calls it, insert). When your Insert is selected, press Shift + E. It’ll set everything automatically for you, and the Edison window will open.
- Click the record button.
Then, you simply click the record button to start recording. You can click it again to stop recording.
- Edit and send it back.
After recording, you can edit the vocal file with Edison, adding effects like in the regular FL Studio workflow. When you feel it’s ready, click on “Send to playlist as audio” to go back to the regular screen to keep working.
- Remember to use your gear.
For both these methods, it’s worth remembering that you need the right tools for the job, i.e., a good microphone and audio interface. Choosing these devices is an art in itself, as you must consider your budget and the technical specifications.
- Consider your location carefully.
However, recording vocals implies a lot more than that. Careful consideration of placing the microphone and performing in front of the microphone can make or break a recording.
- Don’t record too loud.
You need to ensure you have some headroom so the audio recording won’t clip. Clipping means the recorded sound surpasses 0 dB, and the signal is cut. This creates distortion, something you want to avoid, especially with voices.
- Sing without recording at first.
I give my students a tip to check the input signal by singing the song a few times without recording, so they can properly set the gain knob on the audio interface. Try not to get too close to 0 since effects (like reverb) you might want to use later can make the signal pass this mark.
- Use a pop filter.
Using a pop filter is also critical. This will remove unwanted, low-frequency pops created by certain high-energy consonants such as the “p”.
Check our article on How to Make Your Voice Sound Better When Recording Vocals.
FAQs
Here are some important questions and their answers about FL Studio.
Do singers use FL Studio?
Can FL Studio be used professionally?
Conclusion
As you can see, using FL Studio for vocals isn’t as difficult as it seems. Whether it’s comfortable or not, that’s a different tune. The good thing is that vocals can be recorded with pristine quality on FL Studio with the correct steps, including all the prep work.
If you’re into electronic music, you’ll feel right at home with this DAW. It’s also good for many music styles, but bear in mind the workflow differs from other options that emulate a recording studio workflow.
Finally, experimenting is key when using FL Studio or any other DAW. There are many shortcuts or ways to achieve the same thing. If you use it regularly, you’ll develop your own style and will get a better understanding of the software as a whole.


