BecomeSingers is reader-supported. When you buy through links on our site, we may earn an affiliate commission. Learn More
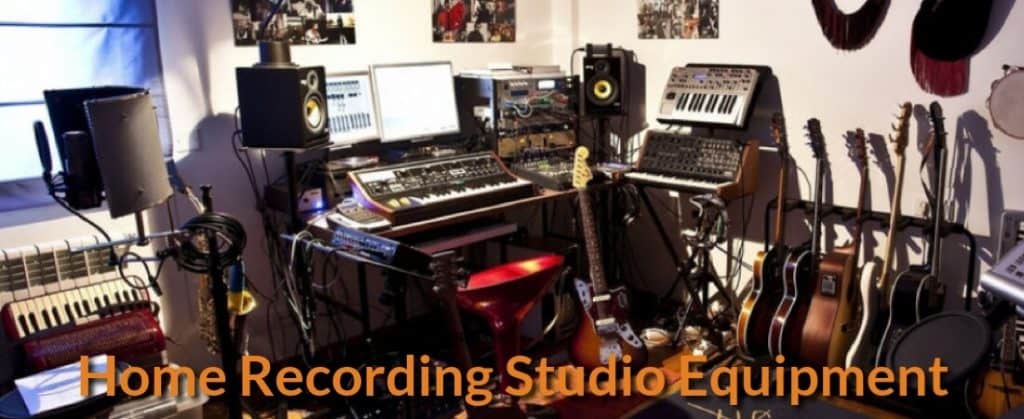
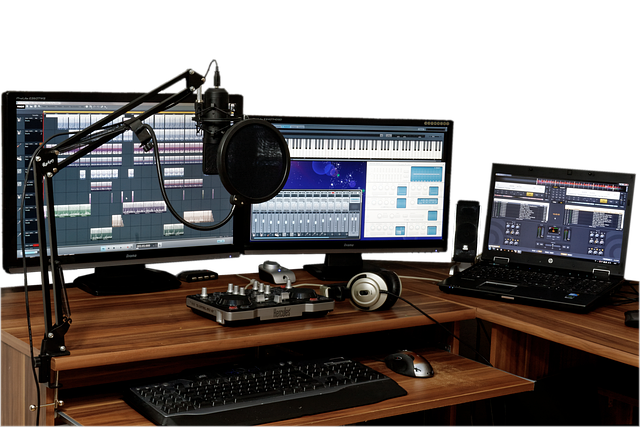
The typical home recording studio has dramatically evolved over time as computer technology and apps technology greatly improved. In the past, a recording studio usually consisted of a live room and control room where the sound engineers operated the audio mixing consoles and effects units. However, with the availability of powerful computers and recording apps, the setups of recording studio have been greatly simplified. Nowadays, to set up a workable home recording studio, you will basically need a fast computer, like the iMac and MacBook, although other computers nowadays are also fast enough to handle sound data during the recording process.
With advanced computer technology at hand, you can build your recording studio with a lower budget. But you still need to equip it with the essential equipment to make it functional. Here is a list of the essential recording studio equipment and home recording studio package & bundle that you should purchase:
Table of Contents
1) The Audio Interface
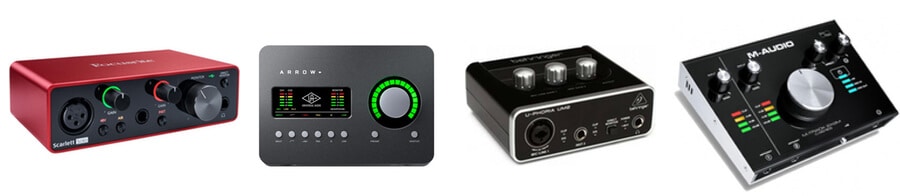
It is definitely essential to have the right audio interface for your computer, and it is basically the next step you have to look after to after getting a workable computer for your home recording studio. This PC or Thunderbolt Mac audio interface brings the sound of your music into your personal computer. Moreover, it allows you to bring the sound out of the drive of your computer during playback time. This audio interface often has concomitant tools that you can incorporate into your computer devices such as microphone amplifiers, digital conversion, monitor management, headphone amplifiers, and DI unit.
It is important that you choose a two-channel type of USB audio interface. It should have a microphone preamp equipped with phantom power, plus it should have a “line-in” for keyboards, stereo, and guitar, including headphones outputs. The main purpose of the audio interface is to connect your computer with other other equipment for singers.
2) Digital Audio Workstation (DAW)
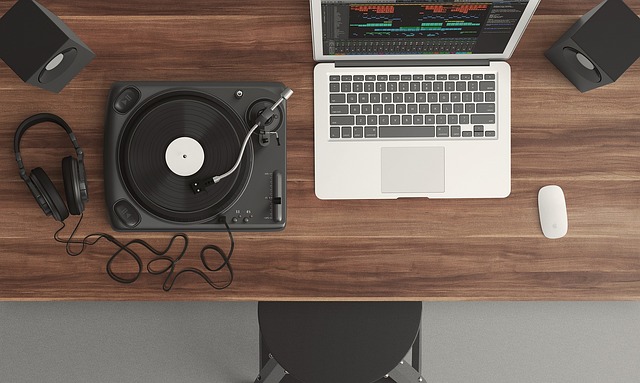
The main software that you are going to install in your computer is the digital audio workstation or DAW. This software will enable you to record, edit, and mix sounds. You must be meticulous in choosing the DAW, for the DAW can be very specific to a particular operating system. Logic, for example, works well with Mac, while Sonar works for PC only.
There are also dual-platform DAWS that include Digital Performer, Pro Tools, Audition, Studio One, Cubase, and Reason. These programs are dependable enough to enable you to finish your recording job. At the onset, you should very well choose the right DAW that would be more convenient for you to use. As you improve in the manipulation of the features of the software, you can then confidently work with other types of DAWS.
3) Headphones
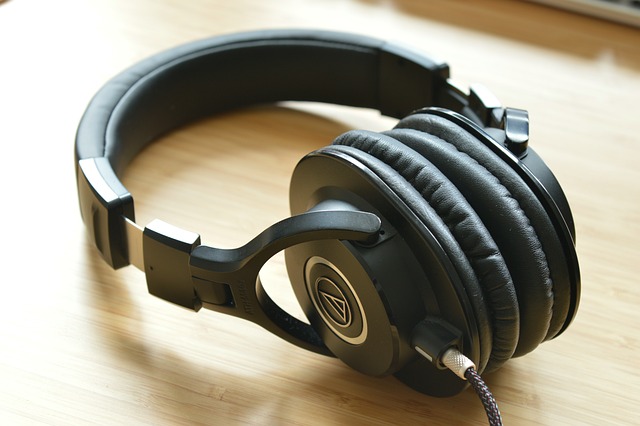
You should also carefully choose the types of headphones that you would have in your home studio. Headphones vary according to purpose and design. Some headphones have closed-back designs while others have open-back designs. At the onset, it is better to use closed-back headphones to ensure that sounds are properly isolated. However, the closed back headphone is more suitable for the beginners who intend to build their first home studio, and the budget is also one of the main consideration factors for them.
Types of Headphones
- Closed back headphones: They are specifically used for tracking, and they offer complete isolation of sounds, though the quality of the sound is sometimes a bit compromise.
- Open-back headphones: On the other hand, offer optimal quality of sound, although the aspect of sound isolation is a bit compromised likewise.
4) Studio Monitors
Mixing of sounds usually takes a lot of time and necessitates the use of studio monitors or nearfield monitors. Sound engineers make use of these monitors to figure out the balance between various sound in each track. These monitors are different from the commercial speakers we have on components because these studio monitors are specifically designed to produce flatter frequency response. This is to ensure that the sounds listened to by sound engineers are neutral and uncolored to enable them to objectively assess and mix the different sounds.
5) Cables (Specifically, XLR Cables)
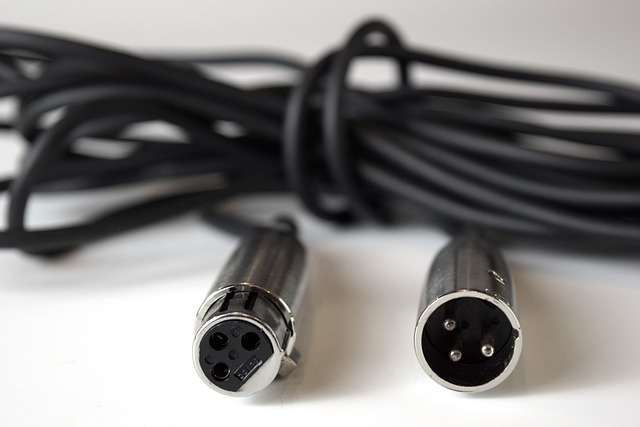
Most of us surely hope that all the pieces of equipment in our home studio are broadcasting without the use of cables, just like the smart devices that we have. Time will definitely come when cables will no longer be necessary in a home recording studio; yet, as of the moment, cables are still essential, and for this reason, you would need XLR cables. You would basically need two types of cables: long cables for your microphones; and short ones to connect to the XLR connectors of your audio interface and monitors.
6) Pop Filters
I remember the first time I recorded our original song in a studio, and I was a bit ignorant of what the pop filter was then. But now, I already know that the pop filter is necessary to filter the vocals. The pop filter is a microphone accessory that readily blocks noises so that your recording would be devoid of cracking sounds called “pops” caused by forceful short breaths. Pops are low-frequency sounds that are irritating to listen to. They are usually created when the singer pronounces the plosive letters like “B” and “P.” Pop filters reduce the sound of pops; they are also useful in preventing saliva from hitting the microphone.
7) Mic Stand
Another vital equipment of a home studio is a mic stand. Without mic stands, it would be very difficult to push through with the recording process. You should be very meticulous in choosing the mic stands for your home studio because mic stands can surely facilitate the recording process. Solid mic stands are worthwhile investments. Hence, if budget is not an issue for you, you should buy pricey mic stands that are sturdy and durable enough to hold the weight of your mics.
8) MIDI Controller
MIDI is essential to a recording studio, especially, for instrumentalists who record accompaniment to a song. MIDI enables you to add nuances and style to your recording. MIDI has interfaces called “MIDI interfaces” which allow you to connect your MIDI to your computer. More often, these interfaces are built-in within the MIDI making it easy for you to connect the MIDI to your computer. MIDI likewise has “MIDI controller keyboards” that come in various sizes of 25 to 88 keys. Moreover, these keyboards come with concomitant features like velocity sensitivity and modulation and after-touch wheels. MIDI also comes with “Mini Pads” which are quite popular among producers and DJs. These Mini Pads come with basic input devices and other features like hardware sequencer. Lastly, these Mini Pads can be readily customized for the DAWs.
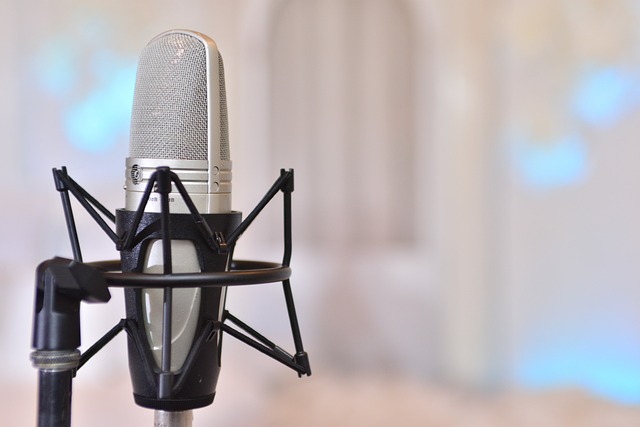
9) Condenser Microphones
For Singer, a condenser microphone is the most important equipment in the recording studio as it is the first and initial entry point for picking up the sound sources from the vocals and acoustic instruments. And the analog sound sources will be then converted into the digital format for mixing and editing purposes.
10) Computer
For the first timer, the computer is the most expensive home studio for them. You will need a powerful computer that will be able to handle and process the heavy DAW editing and mixing tasks. And it is the powerhouse to process the input and output of the sound images. For a computer, MacBook Pro and iMac are what I would recommend.
11) Studio Desk

You should invest in a well-built studio desk. It should be sturdy enough to could support some recording studio equipment. It should also be functional and well-designed. The studio desk will serve as the centerpiece of your dedicated home studio. Moreover, it is the focal point for your organization and productivity. Thus, it should have a good design to facilitate the recording process.
A well-designed studio desk is not only an accessory piece in your recording studio, for it will also affect the recording process. Plus, it will profoundly change your mind while recording. As the focal point of the studio, it will help you optimize space. Hence, it should be designed to facilitate the workflow and make the disposition of various recording equipment and gears easy.
Some recording studio desks have Z-line Designs like that of the Z-Line Designs Cyrus Workstation. It has a pull-out keyboard tray with space for a mouse. This design is incredibly mobile and flexible enough for you to reposition it anywhere in the studio. It also has shelves for increased flexibility and sections and built-in racks for equipment.
12) Studio Chairs
Studio chairs can best complement the studio desk; without it, the desk is almost useless. Since recording and mixing entail long hours of working, you need to be very comfortable while you work. Prolonged sitting can cause back pains and other maladies. Thus, you need to choose chairs that are ergonomic in design. They should be very comfortable and cozy. Remember that a good studio chair is something that could fully support your body, especially the lumbar region, as well as your arms and head.
A great chair can make long works bearable. It should also have wheels so that it could roll across the room without you having to get up.
13) Multi-speaker and Surround Sound Systems
Another essential equipment of a recording studio is the speaker system. A good speaker system helps you attain superior sound in a very compact form. The multi-speaker system is a system for monitoring sounds. It delivers deep low, and sub-bass end via the subwoofers. It also supplies the low, mid, and high-frequency sounds via its other compact speakers.
This monitoring system helps in lessening the impact of low bass frequencies on your ears. It scatters the bass frequencies so that they will not heavily impact your ear. These speakers have smaller sizes, but they pack a powerful punch. You can mix on your computer without worrying about the long-term impact of being exposed to different sound frequencies.
14) Studio Monitor Stands
One important accessory to a recording studio is the studio monitor stand. You will surely need a couple of these stands. Sometimes you will try to figure out where to best position your studio monitors. With the studio monitor stands at hand, you can move the monitors from one place to another to get the optimum balance of sound.
The studio monitor stands should be durable. They will be supporting the monitors, and thus, they need to be sturdy. With these stands, you don’t need to clog your studio desk with monitors.
With the use of these stands, your studio monitors will be on elevated positions, allowing you to avoid the filtering effects. These filtering effects are usually caused by little vibrations between other equipment and the monitors. With these monitor stands, you can do away with these disturbing reverberations and resonances.
15) Monitor Isolation Pads
After addressing the acoustic treatment problems, you can still further improve the quality of recordings by using monitor isolation pads. Monitor isolation pads solve the problem of inaccuracy caused by the unpredictable resonances and vibrations received by the studio monitors through the surface of your studio desk.
They isolate the monitor from the desk by creating a buffer consisting of acoustic pads. These pads prevent the transfer of vibrations from the desk to the monitors. Monitor isolation pads come in different designs. Some of which even provide options on how you would position your monitors. You can tilt these pads at certain angles.
16) Bass Traps
If you did not apply any acoustic treatment to your room, you might find it hard to have a decent recording. So, you should at least try some simple acoustic treatment like the addition of a bass trap. Bass traps provide broader absorption capability. They can absorb a wide range of frequency spectrum, though they are specifically efficient in absorbing lower frequency sounds.
These lower frequencies are usually the primary source of problems in a smaller studio room, and thus, they should be minimized using the bass traps.
17) Diffusers
Another essential element of recording is diffusion. It is vital to acoustic treatment. Thus, you can achieve a higher level of acoustic treatment for your studio room by using diffusers. Diffusers create a natural ambiance that does not totally remove the vivacity from the room. Diffusers also allow all frequencies to randomly disperse, preventing them from building up at a particular spot unnaturally.
Diffusion of frequencies, however, is difficult to achieve in a smaller room. But you can still use diffusers as long as you have enough budget because diffusers are more often expensive.
18) Acoustic Panels
The acoustic panels, of course, are designed to absorb low to high frequencies. They are also good for assuaging the impact of standing waves. These standing waves can cause acoustic problems in parallel-walled rooms wherein sounds tend to bounce back-and-forth at the same spot. So, if you have a square or rectangular studio room, you should make use of these acoustic panels to lessen the effect of standing waves.
Conclusion
When I first recorded in a recording studio, the music producer showed us some stuff that really puzzled me. Things like the monitor isolation pads, diffusers, acoustic panels, and bass traps. I learned from him that sounds of different frequencies behave predictably. Hence, you can make use of equipment to capture the best sound recording. With the help of these accessories, the sound recordings become more balanced. And the majority of problems that make recordings difficult are immediately lessened with the use of these accessories.


