BecomeSingers is reader-supported. When you buy through links on our site, we may earn an affiliate commission. Learn More
The world is teeming with sound waves from different directions. So, if you want to come up with a professional recording, you need to mitigate the impact of these sounds. It is not easy to diminish unnecessary noise and sounds captured by the vocal track recorder. Hence, at the onset, you need to isolate the vocal sounds from these unwanted sounds.
Home studios need acoustic treatment. Small home studios got too many rough edges. These cause reverberations and reflections of sounds. If your home studio isn’t treated, your vocal recordings will suffer. So, your best solution is to improvise a DIY vocal booth.
You need to conceptualize first the type of booth that is appropriate for your home studio. There are many options, of course, of vocal booths at hand. Your budget, however, will be the most important determining factor in your choice of vocal booth.
You got many options when it comes to the design of the vocal booth. You can create, for example, a permanent vocal booth. You can also opt for a movable one that you can move to a new location within the studio. You can also opt for a modular vocal booth that you can purchase online. Here is a list and short descriptions of the different options you have when it comes to vocal booths that you build yourself:
Table of Contents
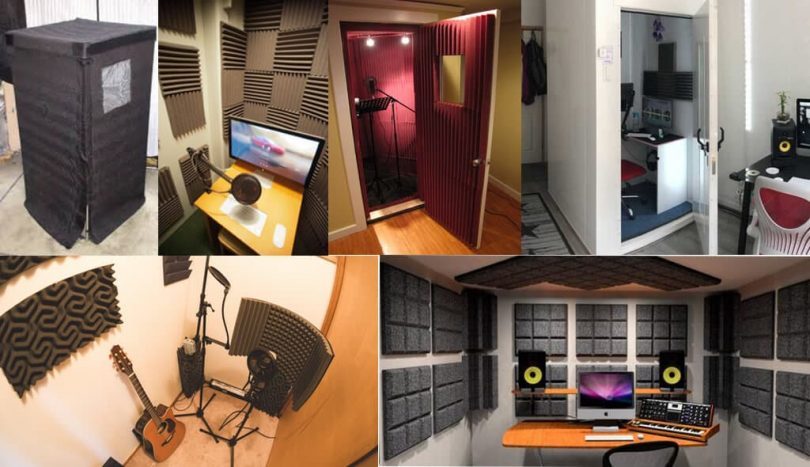
1) Permanent Vocal Booth
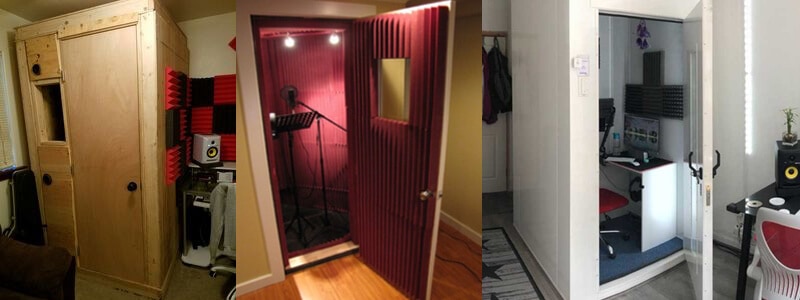
The permanent vocal booth is a booth that stays in one place permanently. This booth offers the most sturdy and highest quality of recordings if you do construct it well. The typical permanent booth has two layers of sound control. The first line of soundproofing, of course, include the walls of this booth.
The walls should be so constructed in such a way that they can filter unwanted external sounds. They should be good enough to prevent unwanted sounds as well as prevent your voice from getting out of the booth.
The interior linings should provide the second line of defense against unwanted sounds. They can consist of studio foam layers, fiberglass, sound panels, or acoustic blankets. These linings should dampen sounds and prevent echoes and reverberations from being recorded. You can use sturdy acoustic materials for your permanent vocal booth because your booth is permanently positioned in the corner of your studio room.
2) Closet Vocal Booth
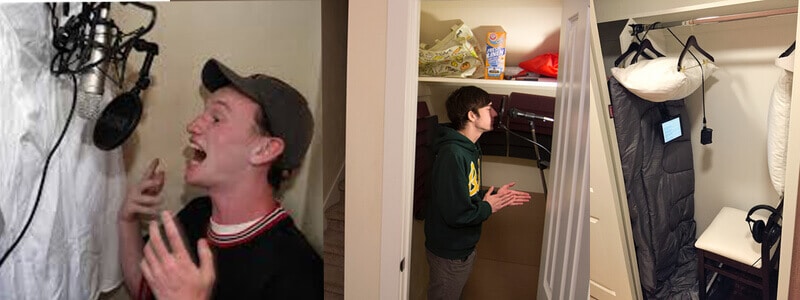
Many home studios are former rooms that come with pre-existing structures like closets or storage rooms. So, if your home studio has one, you can use it to build a closet vocal booth. You can use materials that are available in your home to treat this room or closet. You can use unused pillows, clothes, and blankets as acoustic treatments to dampen sound and echoes.
You can build shelves for stacking these materials. The thicker the absorption capacity of the materials, the better they will absorb sounds. You should refrain, however, from using carpets. This is because carpets tend to absorb only the higher frequency sound waves.
3) Treated Control Room
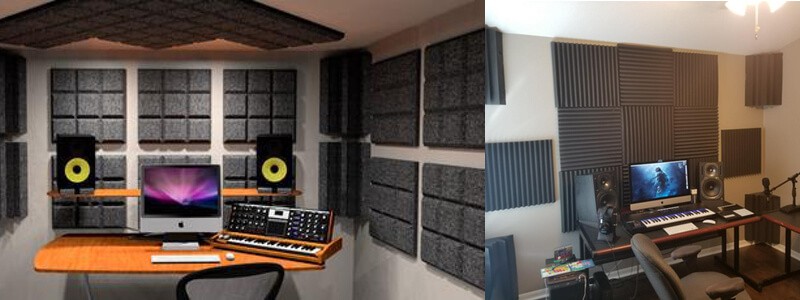
If you have a treated control room, you can also use it as your vocal booth. Just like with the permanent and closet vocal booths, you can treat this control room with materials that can dampen the echoes and reverberations of sounds.
The acoustic treatment of this control room needs not to be complicated. You can buy, for example, pre-built panels or improvise panels for this control room. This setup is ideal if you have a very small space to work within your studio. This kind of treated room is normally more well-treated with the professional and recording studio-grade wall bass traps, acoustic & infusion panels.
4) Modular Vocal Booth
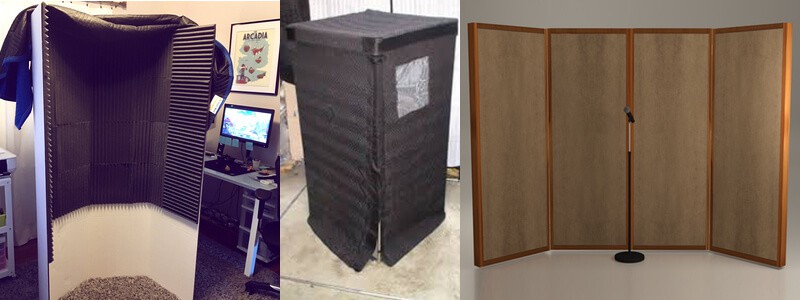
You can also use modular booths to serve as vocal booths during recording. You can buy these modular booths online, or you can also assemble one for your studio. If you assemble it, you should ensure that it contains all the components necessary to make this booth an effective vocal booth.
Modular vocal booths are semi-portable. They can be disassembled and reassembled when needed. It is great if you need to relocate your booth.
A Typical modular vocal booth comes with a frame. On this frame, you can attach the acoustic treatment materials like acoustic blankets. Acoustic blankets can reduce echoes and reverberations. Some modular vocal booth’s structures are made of pipes that can be installed and uninstalled easily.
The effectiveness of modular vocal booths, however, depends on their quality and price. The higher the quality, of course, the better they can mitigate unnecessary sounds. These acoustic blankets, however, are less effective in dampening sounds as compared to the walls of a permanent vocal booth and acoustic panels.
5) Portable Vocal Booth
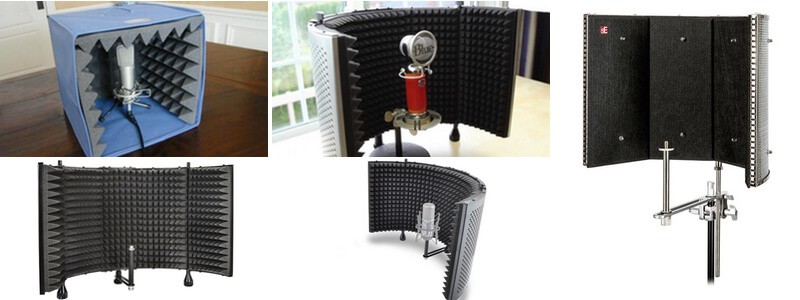
One of the lightest options you have is the portable vocal booth. Since it is lightweight, you can easily transport it from one place to another. Portable vocal booths, however, do not offer the best options for dampening and mitigating the effects of external sounds. Yet, they can at a certain level, reduce echoes and reverberations. These portable vocal booths, of course, are perfect for use by voice-over artists and itinerant narrators.
Because they are expensive and well-built, many think that they are effective in containing unwanted sounds. Yet, upon closer scrutiny, they serve more often as ornaments for the mic stand. You will usually position this portable vocal booth behind the mic stand just facing the vocalist.
If you are not using a bi-directional or Omni mic, however, your mic will not even pick up any reflection sounds. This is because ordinary mics are dull enough to pick up reflections at 180-degree off-axis. So, this vocal booth, as a reflection filter, is practically useless when using such mics. The best position for such a reflection filter, of course, is on the sides where the sounds enter the mic. This option is most suitable for setting up a portable vocal booth in a small apartment.
6) Blanket Booth
One of the cheapest options you have for a vocal booth is the blanket booth. It doesn’t require great assemblage. You can also easily disassemble it. Moreover, it provides covers on all sides of the vocalist.
The blanket booth, of course, will need a frame to support the blanket. This frame is usually made of PVC, wherein you will drape the blankets over. This creates an improvised room where you can record the vocals. You can check online to know the steps and the details on how to build it.
You can use simple moving blankets as drapes over the PVC cube frame. Yet, you can also buy acoustic blankets, which are more expensive. PVC frames are easy to build. They require no gluing and other elaborate steps to build. In a way, the blanket booth is the most versatile and flexible option at hand. Furthermore, The blanket booth also can be built easy by hanging the soundproof blankets from the adjustable ceiling rails. And this option is also very suitable and easy to set up in small apartment too.
Additional Tips on Building A DIY Vocal Booth
You need to consider some factors when building a DIY vocal booth. Whether you are opting for a permanent or closet-type vocal booth, you need to consider the following factors:
1) Make a Good Partition
You may tend to partition your home studio into smaller spaces if you have limited studio space. You may also think that this is the best way for vocal recordings. Yet, a small and cramped space for the booth is also problematic as the big ones.
This is because you will find it hard to dampen reflections and sound buildups if your vocal booth is small. Moreover, with smaller spaces, you get higher main resonant frequencies in your room. This main resonance can muddle the vocalist’s main range. This can be very problematic during recordings.
So, if ever you would choose a home studio room, you should choose a room that affords you a larger working space. This will give you ample space for building your DIY vocal booth. It also allows you to drape the acoustic materials from the ceiling or walls.
2) Choose Carefully Your Absorbing Materials
Lorem ipsum dolor sit amet, consectetur adipiscing elit. Ut elit tellus, luctus nec ullamcorper mattis, pulvinar dapibus leoA lot of us will think that the egg cartons are perfect acoustic materials for sound absorption. Yet, upon closer scrutiny, egg cartons don’t live up to the expectations. Your best choice, of course, would be acoustic panels designed for absorbing sounds. Your second-best options are the moving blankets or any other heavy fabric. You can also use a mattress for such a purpose.
You may be tempted to go for the commercial acoustic foam. Yet, it doesn’t offer the best option for absorbing sounds. It is not also very effective in mitigating echoes and reverberations. The more massive and more absorbent your material is, the more effective it is.
3) Carefully Position Your Portable Vocal Booth
You will often see vocal booths that are positioned at the back of the microphones. So, you may assume that you should position your portable vocal booth right at the back of the microphone. Yet, it is not the best side to focus on.
If you are using cardioid mics, for example, most of the sounds behind the mics are mostly nullified. Hence, it is pretty much useless to position the portable vocal booth at the back of the mic. The more reasonable thing to do is to position the portable vocal booth behind you as you sing on the mic.


