
BecomeSingers is reader-supported. When you buy through links on our site, we may earn an affiliate commission. Learn More
Perhaps you have an expensive microphone but were disappointed with the audio quality because you expected it to be clearer and better. Or you’re trying to make the best out of a bad situation by improving the sound quality of your budget microphone without spending too much money on a new one. Or it could be as complicated as spending the extra time to EQ and compress your vocals after recording to mix and clean up your sound.
Well, whatever the case may be, we’re here to show you how to maximize the use of your microphone so you can get higher-quality audio. So stick around to learn how to record better audio recordings.
There are always ways to improve the sound quality of your microphone that can be adapted during recording or post-production.
However, remember that applying these tricks with a cheap microphone won’t produce miraculous results; you can only slightly improve your sound.
Let’s look at the main reasons why your microphone sounds a bit off in the first place and what you can do to fix it.
Table of Contents
What Are the Main Factors Affecting Your Microphone’s Sound Quality?
A few factors could be preventing your microphone from reaching its full potential. One of them is recording in a room with too much background noise. If you want to avoid unnecessary recording noise, such as people talking in another room, cars driving by, dogs barking outside your window, and so on, it’s critical to record in a quiet room.
Another factor contributing to poor sound quality is getting too close to your microphone. This will cause your sound to clip or distort, making it entirely inaudible for your audience.
It’s also crucial to check your cable; whether using an XLR or USB cable, be sure to use a shielded, balanced cable when connecting your microphone, especially if you’re connecting it to a preamp or computer. They pick up less noise, interference, and buzzing, all of which will degrade the sound quality of your recording.
This may seem obvious, but make sure you’re using the right side of your microphone. Some popular room microphones, like the Blue Yeti, are “side facing,” meaning you should record your vocals into the side of the microphone. Many people make the mistake of recording into the top of the microphone, which leads to the sound needing to be correctly picked up. This is a very common feature among multi-pattern USB microphones.
These are some of the main factors that could affect your recordings’ sound quality. Other factors include incorrect computer sound settings, which we’ll discuss shortly.
Let’s check how you can attack sound quality issues on various devices. Whether you’re a PC or Mac user or want to improve your microphone’s sound quality while playing with your friends on your Xbox or PlayStation, let’s look at how you can capture better vocal recordings and have an overall better experience.
How Can You Make Your Microphone Sound Better?
After you’ve chosen a quiet area for your recording, positioned yourself within about 8 inches of your microphone, set up a pop filter to eliminate plosive sounds, and paid attention to your microphone’s polar pattern, it’s time to check your computer or device’s settings to see if there are any adjustments you can make to enhance the quality of your sound further.
One of the most important things to check is your microphone’s gain level. Gain refers to the “sensitivity” of your microphone and how loud your input level is before it enters your computer or device. It increases the signal strength from the mic level to the line level so that your microphone signal is compatible with your device.
If your microphone’s gain level is set too high, your recording will be too loud and likely clip, ultimately ruining your sound quality and rendering it inaudible.
To prevent this from happening, you should lower the microphone’s gain level to roughly 75%–80%. If your microphone has a built-in gain-level knob or slider, simply turn it down. If it doesn’t, you’ll have to access your computer’s sound settings to fix it.
*Remember that gain and volume are not the same thing. Gain controls how loud your input level is before it reaches your computer or device. While volume controls how loud the output signal strength is.*
For Windows PC users
If you’re a PC user, click on the Start menu, then Settings.

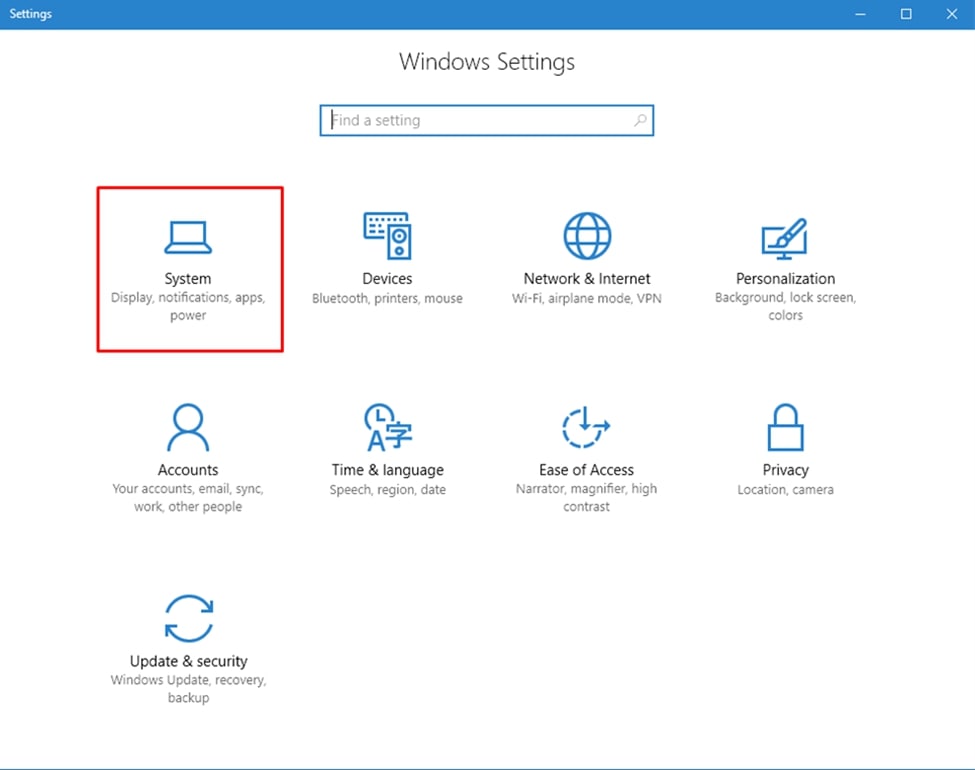
In Settings, click on System.
And then Sound.

On the right side of the window, you will see “Sound Control Panel.” Click on it.

In the sound control panel, go to the “Recording” tab.

Find the microphone you want to boost from the list, double-click on it, and then go to the “Levels” tab.

You will see a 0 to 100 slider. Increase the number of the slider until you reach 75-80 to increase the gain level of your microphone.
For Mac users
Click on the Apple logo in the top left corner of your window, then on “System preferences.”
In “system preferences,” click on Sound.

In “Sound,” click on the tab that says “Input.”

You will then see your microphone on the list of devices, click on it, then adjust the “input volume” slider to about 75%-80%.

For PS4 users
If you’re playing with your friends or live-streaming and need to adjust the gain level of your microphone, follow these steps.
On your controller, keep holding down the PlayStation icon until you access the Quick Menu.

Choose Sound/Devices, then Adjust Microphone Level.


It’s best to keep it below 80% so that your voice is heard clearly and without too much background noise.
For Xbox users
Press the glowing Xbox icon on your controller to access the menu. Then look for the “Audio & Music” tab.


There aren’t any specific microphone gain level controls on the Xbox, so feel free to find the sweet spot between your headset volume and your mic monitoring volume.
Other Alternative Methods
Using a high-quality microphone instead of a cheap one will significantly improve your sound quality. However, if investing in a brand-new, high-end microphone is not an option, and you still believe there is room for improvement with your budget mic, you are right.
1. EQ
If you’re using a budget mic, chances are the sound quality isn’t very clear and detailed. You can fix this by EQing your sound using a DAW or a free audio editor like Audacity. You can boost the low frequencies if you feel like your vocals could use a little more bass. Mids if you want to give your vocals an overall push. Or high frequencies if you think your vocals need some treble.
2. Compression
Compression is crucial if there are sudden volume spikes and uneven volume levels throughout your vocal recording. Compression balances your vocal track by minimizing the volume difference between the loudest and quietest parts of your voice.
3. Noise Reduction
There are always free noise reduction plugins or plugins you can purchase and use within your DAW to clean up your vocals. If you’re not using a DAW, you can always download Audacity for free and use its own noise reduction plugin. This will remove background sounds such as hums, whistles, and hisses and significantly clean up your sound.
Check out James Mann’s article on How to Make Your Voice Sound Better When Recording Vocals.
FAQs
What is the highest-quality mic in the world?
What type of microphone is best for vocals?
Do expensive microphones make a difference?
Conclusion
There’s no reason to spend money on a new expensive microphone if the one you already have is doing a good job. There are always tricks and methods to improve the sound quality of your microphone, and we’ve covered the majority of them today. However, if even after fixing the things you were possibly doing wrong while recording and following all of our tips and tricks don’t help you improve your microphone’s sound quality, then it might be best to look for a new microphone.


